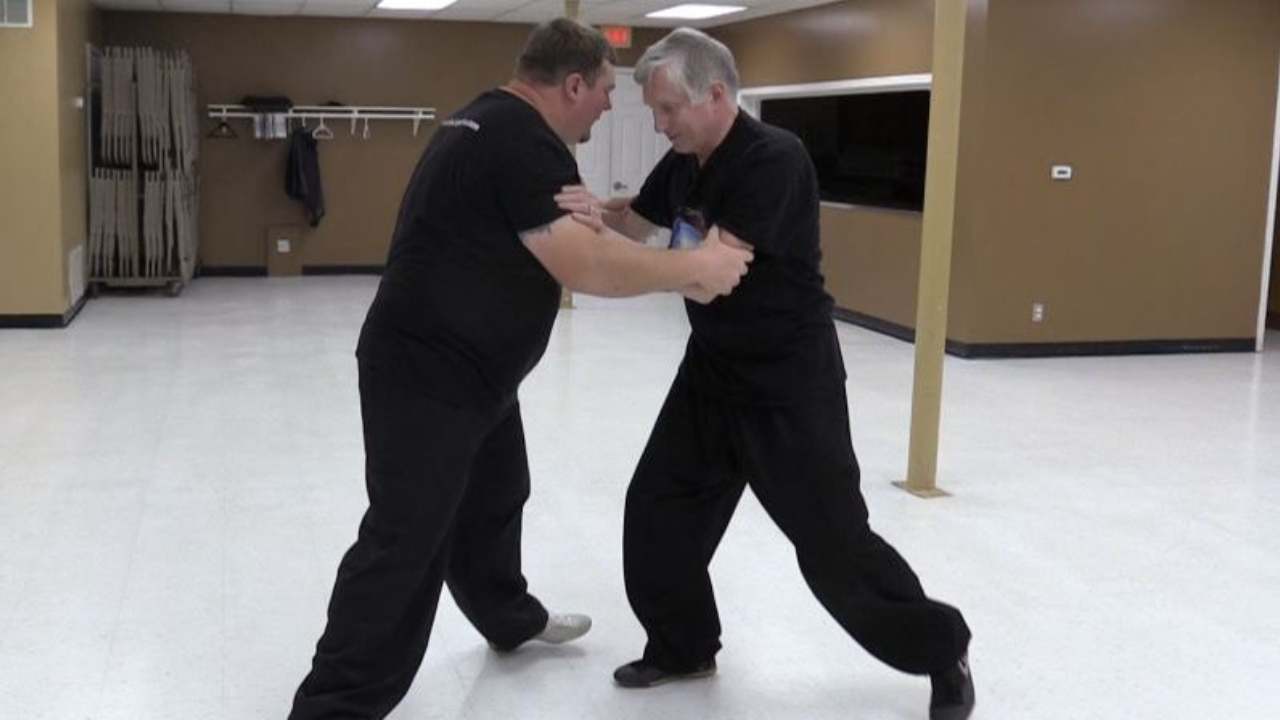
Pole Training in Push Hands
1️⃣ What Two Poles Between Two People Actually Do
Instead of palm-to-palm contact,
the poles create:
Two fixed force lines
Two independent contact bridges
Zero hand grabbing
It removes:
Finger control
Wrist manipulation
Soft cheating adjustments
Now everything must come from:
Center → Kua → Legs → Ground.
2️⃣ Typical Structure Position
Usually:
Each person holds two short poles
Right hand to right hand pole
Left hand to left hand pole
Poles cross slightly forward
Arms remain rounded (Peng structure).
Elbows sunk.
Shoulders relaxed.
3️⃣ What This Trains in Push Hands
With palm contact, people can:
Adjust angles subtly
Collapse wrists
Press with fingers
With poles, you cannot.
The poles expose:
Whether force stays in arms
Whether shoulders lift
Whether center tilts
Whether one side dominates
Two poles mean:
You cannot hide imbalance.
4️⃣ How to Receive With Two Poles
When partner pushes one pole more than the other:
Do NOT:
Fight that side with that arm
Do NOT:
Shift hips toward that side
Instead:
Let both pressures enter center.
Imagine:
Two arrows entering a rotating sphere.
The sphere does not tilt —
it rotates slightly to absorb.
5️⃣ Central Equilibrium Test
If your center is correct:
Both poles feel connected
You don’t feel split left/right
Weight remains balanced
Kua remains level
If incorrect:
One elbow flares
One shoulder rises
One knee collapses
Pelvis shifts laterally
Two poles are ruthless in revealing this.
6️⃣ Rebound with Two Poles
Very important:
You cannot rebound with one arm only.
Proper issuing is:
Ground → Both legs → Dantian rotation → Both poles expand simultaneously
Even if direction is diagonal,
the center remains unified.
If one side issues earlier,
your opponent will feel the split.
7️⃣ Why This Is Advanced Push-Hands Work
This method trains:
Bilateral integration
Dantian as command center
Anti-tilt stability
Simultaneous Peng in both arms
It is excellent preparation for:
Diagonal Peng-Lu-Ji-An exchanges
Anti-corner push
Multi-vector competition scenarios
8️⃣ Theoretical Link to Classics
This directly expresses:
立身中正安舒
"Stand upright, centered, comfortable."
And:
上下相隨
"Upper and lower follow each other."
Without true center,
two poles immediately expose the weakness.
9️⃣ Advanced Internal Goal
At higher level:
You no longer feel two poles.
You feel one field.
Like:
Two tangent lines touching one sphere.
Both hands are merely extensions of the same core.
If you’d like, we can now explore:
• How stepping integrates into two-pole push hands
• How diagonal neutralization works with poles
• How this improves your designated push-hands competition model
• Or how Wu-Hao style might interpret this
Which direction shall we deepen?Trains🟤 Traditional Model: Tai Chi Long Pole (大杆 / 黏杆)
The long pole exaggerates three things:
Leverage magnification
Structural honesty
Central instability exposure
If your center deviates even slightly —
the pole tells the truth immediately.
2️⃣ Receive & Rebound — Mechanism Explained
You asked specifically:
How to learn receive and rebound and remain central equilibrium?
Let’s separate into phases.
Phase A — Receiving (接)
What NOT to Do
Do not resist with arms.
Do not collapse chest.
Do not retreat hips first.
Do not lean.
What Actually Happens
When force enters the pole:
1️⃣ Hands do not act first
2️⃣ Force travels into kua (胯)
3️⃣ Weight spirals down to Yongquan
4️⃣ Ground reaction force builds
Biomechanics:
Shoulders relax → load transfers through fascia chains
Spine stays vertical
Kua folds microscopically
Pelvis remains level (not tucked aggressively)
This is suspension absorption, not muscular bracing.
Phase B — Storing (蓄)
The pole forces you to discover:
You cannot rebound if you did not fully receive.
Storing is:
Elastic lengthening of posterior chain
Spiral winding through dantian
Vertical pressure compression into floor
It is NOT:
Squatting
Muscle tightening
Locking knees
Phase C — Rebound (發)
Rebound in pole training teaches:
Power does not go from arms outward.
It rebounds from the floor upward.
Sequence:
Yongquan → ankle → knee → kua → dantian → spine → shoulder → elbow → wrist → pole
If central axis deviates,
rebound leaks sideways.
3️⃣ Remaining Central Equilibrium
This is the most difficult part.
Long pole magnifies imbalance because:
The longer the lever, the more torque
Any leaning becomes amplified
Correct Internal Model
Return to your sphere theory:
Feet = contact + rebound points
Kua = equator
Dantian = rotational core
During receiving:
Sphere compresses slightly downward
Equator remains level
Core rotates, not tilts
If you tilt → you lose central equilibrium.
4️⃣ Two-Person Long Pole Methods
Method 1: Static Receiving Drill
Both hold pole.
One pushes slowly.
Receiver:
No stepping
No retreating hips
Allow downward spiral
Goal:
Feel pressure going to soles, not shoulders.
Method 2: Spiral Neutralization
Push is diagonal.
Receiver:
Turn dantian slightly
Let pole draw an arc
Redirect through kua rotation
Do not "block".
Pole should feel like:
"Rolling apple on sphere surface"
Method 3: Sudden Pulse Test
Partner gives short shock.
Check:
Did shoulders rise?
Did chest collapse?
Did pelvis jerk?
If yes → center unstable.
5️⃣ Theoretical Foundations
Classical References
From Tai Chi Classics:
引進落空
"Lead into emptiness"
其根在腳
"The root is in the feet"
Long pole training literally forces these truths.
6️⃣ Common Mistakes in Long Pole Practice
| Mistake | What Happens |
|---|---|
| Leaning back | Lose vertical axis |
| Over-tucking tailbone | Pelvic lock |
| Arm resistance | Shoulders stiffen |
| Knee collapsing inward | Kua disconnected |
| Trying to rebound too early | No ground storage |
7️⃣ Physiological Explanation
Long pole trains:
Proprioception
Tendon elasticity
Deep stabilizers (transversus abdominis, multifidus)
Fascial recoil chains
It does NOT primarily train muscle power.
It trains force transmission efficiency.
8️⃣ Advanced Internal Goal
At higher level:
You do not feel:
Push
Store
Rebound
You feel:
Continuous rolling pressure exchange.
Like two spheres contacting at a tangent point.
9️⃣ Ultimate Standard Test
If:
You can receive without shoulder movement
Rebound without visible preparation
Maintain vertical axis under sudden torque
Then central equilibrium is stabilized.
Excellent question.
Where you place the pole determines what structure is being trained — arm power, shoulder frame, kua transmission, or whole-body elasticity.
Let’s go progressively from beginner to advanced.
1️⃣ Most Common Contact Point — Forearms (Primary Method)
Why forearms?
Because they are:
Between hand and elbow (bridge segment)
Structurally safer
Directly connected to shoulder → spine → kua
This trains:
Peng structure through forearm arc
Relaxed shoulder suspension
Force entering through ulna line toward elbow
Key detail:
The pole rests on the meaty part of forearm, not wrist joint.
If wrist collapses → structure broken.
2️⃣ Mid-Level — Elbow Line (肘線)
Now the pole is closer to elbow.
Why?
To remove hand manipulation.
This reveals:
Whether shoulder floats upward
Whether chest tightens
Whether kua can absorb directly
This is powerful for training central axis transmission.
If elbow drifts backward → you are resisting.
If elbow drops downward → kua disconnected.
3️⃣ Advanced — Kua Line / Lower Abdomen Alignment
This is not literally pressing the pole into your stomach.
It means:
The pole aligns with:
Forearm → elbow → shoulder → kua → opposite leg.
In high-level practice, the feeling is:
The pole is touching your center, even though physically it rests on the arms.
Now the body behaves as one elastic unit.
4️⃣ What You Should NOT Do
Avoid placing pole:
Directly on chest (collapses structure)
On wrist joint (too weak)
On shoulder (too high, lifts center)
Against stomach (no external frame support)
Unless doing specialized drills.
5️⃣ In Two-Person Drills — Typical Configurations
Parallel Push (Front-Facing)
Pole usually rests on:
Both partners’ forearms
Diagonal Neutralization
Pole rests:
On one forearm
Or one forearm vs partner's two hands
Testing Root
Sometimes pole touches:
One forearm while the other hand floats (to test one-sided rooting)
6️⃣ Internal Principle (More Important Than Location)
The real question is not:
Where is the pole touching?
But:
Where does the force go?
Correct pathway:
Pole → forearm → elbow → shoulder socket (relaxed) → spine → dantian → kua → leg → foot → ground
If it stops at shoulder → you are using upper body.
If it stops at knee → structure collapsed.
If it reaches foot → you can rebound.
7️⃣ For Your Level (Given Your Sphere Model)
You should train mainly:
✔ Forearm contact
✔ Elbow-line receiving
✔ Diagonal spiral entry
Because you are already studying:
Dantian rotation
Central vertical axis
Rolling sphere model
Pole training becomes your external validator.
Ah — now you are describing 雙杆練習 (two-pole training).
That is a different level from single long-pole work.
When two poles are used — one for each hand —
the purpose is no longer just receiving force.
It becomes:
Training independent hand connection while maintaining one central axis.
Let’s clarify this carefully.
1️⃣ How Two-Pole Training Is Usually Positioned

Typical structure:
Each partner holds two short poles
Right hand connects to right hand
Left hand connects to left hand
The poles cross in front
So now:
You have two incoming force lines, not one.
This exposes whether:
Your center splits
Your shoulders separate
Your kua disconnects
2️⃣ Where Exactly Do They Put the Poles?
Usually:
✔ On the Palm / Laogong line
Not gripping tightly — but resting.
Why?
Because palm connection trains:
Peng expansion
Forward structural integrity
Wrist neutrality
✔ Or Slightly Toward the Heel of the Palm
To avoid wrist collapse.
Very important:
The wrist must stay neutral.
If wrist bends, force stays in arms.
3️⃣ What Two Poles Are Actually Training
With one pole:
You learn whole-body transmission.
With two poles:
You learn bilateral integration.
Meaning:
Left and right arms must feel separate,
but center must feel single.
This directly trains:
Dantian as rotational hub
Kua as equator
Independent yet unified arms
This matches your “human sphere” model exactly.
4️⃣ The Big Problem Two Poles Reveal
Most practitioners:
Resist one pole
Yield on the other
Or shift weight unevenly
But correct method is:
Receive both poles into one center.
You do NOT:
Fight left separately
Fight right separately
Instead:
Both pressures spiral into the same dantian field.
5️⃣ How to Receive with Two Poles
When partner pushes:
1️⃣ Relax shoulders
2️⃣ Let elbows sink
3️⃣ Micro-fold kua
4️⃣ Feel pressure go to soles
Not:
Push back with right arm.
Pull back with left arm.
It must feel like:
Two ropes pulling a suspended bell.
The bell does not tilt —
it vibrates from the center.
6️⃣ How to Rebound with Two Poles
Rebound cannot be:
Right arm first, then left.
It must be:
Ground → center → spiral → both poles simultaneously.
Otherwise your body splits.
This is why two-pole training is very advanced.
7️⃣ Theoretical Explanation
This practice develops:
Bilateral fascial integration
Cross-body sling systems
Deep core stabilizers
Rotational symmetry
It prevents:
Over-dominant side habits
Shoulder lead push
Hip drifting
8️⃣ Classical Concept Behind It
This relates to:
左右相顧
“Left and right mutually attend.”
And
由中而發
“Issue from the center.”
Two poles make this impossible to fake.
9️⃣ For You (Given Your Research Depth)
Two-pole training is excellent for:
• Testing designated push-hands structural neutrality
• Refining diagonal issuing vs straight issuing
• Eliminating hidden shoulder tension
• Stabilizing central equilibrium under multi-vector load
If you'd like, I can next explain:
🔹 How two-pole training improves diagonal 掤捋擠按
🔹 Or the biomechanics of how the dantian rotates without tilting
🔹 Or how this relates to Wu-Hao spiral stepping theory
Which direction shall we go?
沒有留言:
張貼留言